
Carl Calabria’s Guide to Using Inserts on the Mark One
You may have noticed already that Carl Calabria keeps things organized here at MarkForged. He keeps the tools clean and organized; this both increased productivity and sets the tone for a clean, organized company culture. Carl is also a fan of constantly improving, so he designed this part to both organize the tool set used to maintain a Mark One 3D printer and to improve his additive manufacturing skills.
This Mark One Maintenance Toolset Caddy contains all the bits and sockets used to service a Mark One 3D printer. It also includes two different types of inserts including 12 magnets to keep the bits in place. The inserts were added during printing using the pause function of the MarkForged printer and software.
A Step by Step Guide to Adding Inserts

1. CAD the caddy in OnShape, leaving cavities for the razor blade and 12 magnets in OnShape
2. The razor blade cavity and magnet cavities are continuous

3. No need to separate them with nylon
4. The razor blade is there because the magnets in the first version jumped out and stuck to the print head
5. Export from OnShape as a STL
6. Import the STL into the MarkForged Eiger Software
7. Click Part View
8. Click 2d view
9. Add pauses at two points
10. Scroll to select cavity layer using the layer selector at the bottom
11. Insert the first pause at Layer 10, to insert the razor blade
12. Put second pause at layer 40, to insert the magnets

13. Click pause after layer at the upper right

14. Start the print and stare in wonder as the build starts
15. When layer 10 pauses, insert the razor blades, with a thin layer of glue stick applied to the top of the razor blades
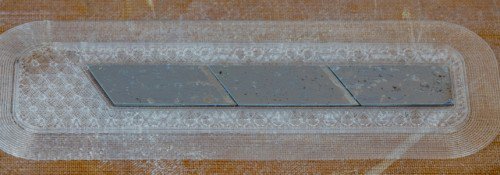
16. Click resume print on the touchscreen

17. Add some glue over the magnets, to ensure adhesion
18. Click resume print on the touchscreen
19. The rest of the caddy will print on top of the magnets

Notes
- The height of cavity should be the same size as the embedded part
- If cavities are taller, you'll be printing in midair and can have a print failure
- If too short, the print head will bump into the inserts
- Glue on the inserted hardware ensures adhesion of the layer above the inserts
- Download the STL Here
- Download the MFP Here
모든 블로그와 블로그에 포함된 정보의 저작권은 마크포지드에 있으며, 당사의 서면 허가 없이 어떤 방식으로든 복사, 수정 또는 채택할 수 없습니다. 당사의 블로그에는 당사의 서비스 마크 또는 상표뿐만 아니라 계열사의 상표가 포함될 수 있습니다. 귀하가 당사의 블로그를 사용한다고 해서 당사의 사전 허가 없이 당사의 서비스 마크 또는 상표를 사용할 수 있는 권리나 라이선스가 부여되는 것은 아닙니다. 당사 블로그에서 제공되는 상표 정보는 전문적인 조언으로 간주되어서는 안 됩니다. 당사는 새로운 정보, 후속 이벤트 등을 바탕으로 블로그를 업데이트하거나 수정할 의무가 없습니다.
새로운 정보를 놓치지 마세요
Markforged의 최신 컨텐츠를 편지함으로 받으시려면 구독하십시오.