
Carl Calabria’s Guide to Using Inserts on the Mark One
You may have noticed already that Carl Calabria keeps things organized here at MarkForged. He keeps the tools clean and organized; this both increased productivity and sets the tone for a clean, organized company culture. Carl is also a fan of constantly improving, so he designed this part to both organize the tool set used to maintain a Mark One 3D printer and to improve his additive manufacturing skills.
This Mark One Maintenance Toolset Caddy contains all the bits and sockets used to service a Mark One 3D printer. It also includes two different types of inserts including 12 magnets to keep the bits in place. The inserts were added during printing using the pause function of the MarkForged printer and software.
A Step by Step Guide to Adding Inserts

1. CAD the caddy in OnShape, leaving cavities for the razor blade and 12 magnets in OnShape
2. The razor blade cavity and magnet cavities are continuous

3. No need to separate them with nylon
4. The razor blade is there because the magnets in the first version jumped out and stuck to the print head
5. Export from OnShape as a STL
6. Import the STL into the MarkForged Eiger Software
7. Click Part View
8. Click 2d view
9. Add pauses at two points
10. Scroll to select cavity layer using the layer selector at the bottom
11. Insert the first pause at Layer 10, to insert the razor blade
12. Put second pause at layer 40, to insert the magnets

13. Click pause after layer at the upper right

14. Start the print and stare in wonder as the build starts
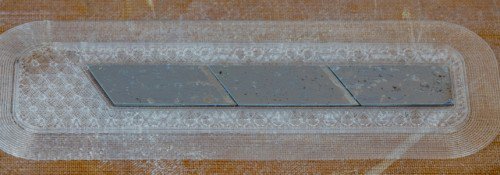
15. When layer 10 pauses, insert the razor blades, with a thin layer of glue stick applied to the top of the razor blades
16. Click resume print on the touchscreen

17. Add some glue over the magnets, to ensure adhesion
18. Click resume print on the touchscreen
19. The rest of the caddy will print on top of the magnets

Notes
- The height of cavity should be the same size as the embedded part
- If cavities are taller, you'll be printing in midair and can have a print failure
- If too short, the print head will bump into the inserts
- Glue on the inserted hardware ensures adhesion of the layer above the inserts
- Download the STL Here
- Download the MFP Here
所有博客和博客中包含的信息版权均归 Markforged 公司所有,未经我们的书面许可,不得以任何方式复制、修改或采用。我们的博客可能包含我们的服务标志或商标,以及我们附属公司的服务标志或商标。未经我们事先许可,您使用我们的博客并不构成您使用我们的服务标记或商标的任何权利或许可。Markforged 博客中提供的信息不应被视为专业建议。我们没有义务根据新信息、后续事件或其他情况更新或修订博客。
不错过任何一篇文章
订阅以在您的收件箱中获取新的 Markforged 内容